Introduction
This guide will show how a regular user can submit their own timesheet for approval
Steps
Step 1: Log in to your account
Step 2: Go to 
Step 3: Click on the 
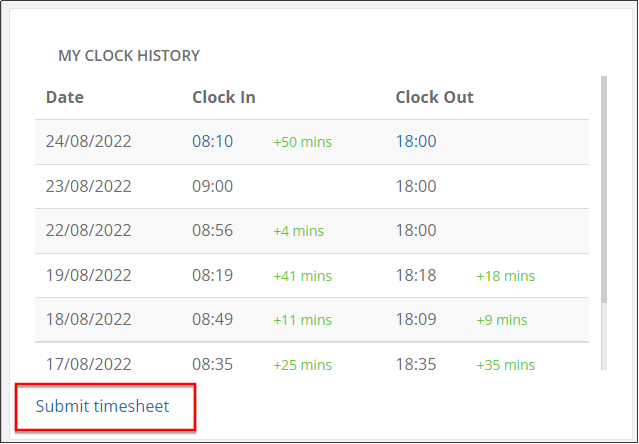
Step 4: Click on 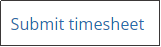 in the My Clock History box
Step 5: Complete the fields accordingly:

- Period – this displays the previous and current month. The employee must make sure that he/she submits the timesheet in a timely manner. Otherwise, the admin will need to manually compute for the salary.
- Custom – this allows the employee to set the from and to date of the month chosen.
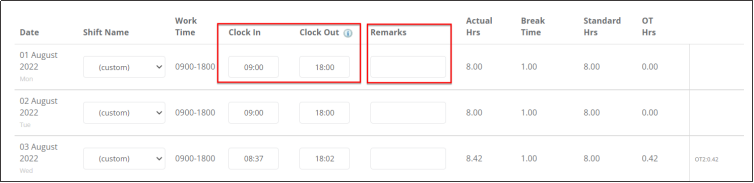
Step 6: Click on ![]() The details of the clocking data will then show. The employee has the option to enter/add clock data if there are missing clocks in and out. Also, the remarks field is enabled for any notes the approving officer can take note of. (This will only be available if you are allowed to edit, if you are not allowed to edit, these fields are grayed out can only be viewed)
The details of the clocking data will then show. The employee has the option to enter/add clock data if there are missing clocks in and out. Also, the remarks field is enabled for any notes the approving officer can take note of. (This will only be available if you are allowed to edit, if you are not allowed to edit, these fields are grayed out can only be viewed)
Step 6: Once all the information is correct, click on  The timesheet will then go to the Approving Officer/Processing Officer for approval.
NOTES:
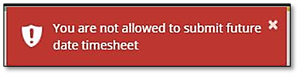
1) If a user tries to submit a timesheet that includes a future date, the system will not allow the submission and will display an error:
2) If a user tries to submit a timesheet with incomplete data (for example, no clock in/out for one date), the system will prevent the submission and will display this error: