Please follow the instructions below to create cost centers and assigning users to the respective cost centers.
Step 1: Click on  .
.
Step 2: Click on  .
.
Step 3: Click on the  sub-tab under the General tab.
Step 4. Input the Cost Center Code and Cost Center Description into the boxes.
Step 5. Click  button to save it.
To manually assign Staff to Cost Center:
Step 1: Click on  .
.
Step 2: Click on  .
.
Step 3: Find the staff and click on the ![]() icon. You will be tajen to the Update Pay Information page.
icon. You will be tajen to the Update Pay Information page.
Step 4: Click on  .
.
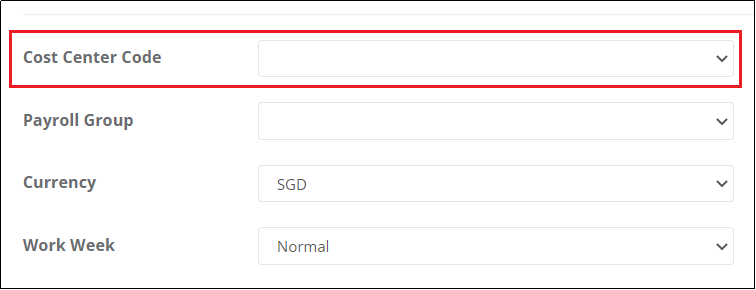
Step 5: Scroll down below to find the Cost Center field. Select the Cost Center Code for this staff.
Step 6: Click on the  .
.
NOTE: An import function is available to easily upload a file for adding different cost centers, at the same time assigning the users to the respective cost centers.
Step 1: See the bottom right side of the page. Click on .
Step 2: You will be taken to the page as seen below. Click Download Template.
Step 3: Following the instructions above, update and save the file.
- User ID (mandatory) - the user's login username
- Cost Center Code (mandatory)
- Cost Center Description (mandatory)
Step 4: Go back to the same page to upload the file. Click Import to proceed.
Step 5: You will see the mapping page as shown below. Click Next.
Click Proceed to complete the import.